Antler Dog Chews

Antler Dog Chews
Find great antler dog chews at our Etsy shop!

Wednesday, September 23, 2009

Yummy Chicken Marinade


We love to grill at our house. And on the super hot days of summer, it's always nice to grill outside instead of heating up the house. But grilling can get old if you don't have different marinades for your meats. This is one of my favorite chicken marinades. It has a nice sweet citrus flavor. Everyone will be sure to love this chicken!! If your running low on time, 2 hours will be fine to marinade the chicken, but the longer you marinade the chicken the more the flavors will penetrate into the chicken. I hope you all enjoy!

Yummy Grilled Chicken Marinade

¼ cup vinegar
3 tablespoons Dijon mustard
3 cloves garlic, minced
1 lime, juiced
1 lemon, juiced
½ cup brown sugar
1 ½ teaspoons kosher salt
6 tablespoons olive oil
ground black pepper
6 chicken breasts or thighs boneless or with bone

Mix all ingredients together in a bowl and pour into a Ziploc bag. Place chicken into the bag and marinate in the refrigerator for anywhere from 2 hours to overnight. Remove chicken from the marinade and grill until juices run clear.

Tuesday, September 22, 2009

Loaded Brownie Chipper Cookies


I came up with the idea for this cookie one afternoon while looking at a plate of brownies on my counter. I'm sure that my kids would have eaten the last 4 brownies, but I wanted to see how a cookie with leftover brownies inside of it would turn out. So, I set out to make these cookies. They turned out pretty good!! With the peanut butter and chocolate chips inside, it gives for a nice flavor. And the chunks of brownie inside the cookie are nice and crispy and chocolaty. I'll be making these again for sure if I have any leftover brownies!

Loaded Brownie Chipper Cookies

½ cup butter, softened
½ cup shortening
1 cup brown sugar
½ cup sugar
2 eggs
1 teaspoon vanilla
2 ½ cups flour
1 teaspoon baking soda
1 teaspoon salt
1 cup peanut butter chips
1 cup chocolate chips
2 cups pre-made brownie chunks, cut into ¼” pieces

Preheat oven to 350°F.
In a stand or electric mixer, cream together the butter and shortening. Add the sugars and mix until well combined and creamy. Add in the eggs and vanilla and mix until combined. Mix in the flour, baking soda and salt, making sure that the mixture is thoroughly combined. Add in the peanut butter and chocolate chips, mix until combined. Lastly, add in the brownie bits, only mixing until just combined. Do not over mix with the brownie bits inside of the dough. Place dough onto ungreased cookie sheets with a 2 tablespoon cookie scoop, or equivalent. Make sure the cookies are about 2 inches apart and bake for 10 to 12 minutes or until golden brown. Cool on a wire rack and enjoy!

Monday, September 21, 2009

Humburger Steaks with Creamy Mushroom Gravy

I tend to notice that my kids will eat dinner a whole lot better if it's something with a gravy or sauce. Are your kids like that? Maybe they just like to dip their foods into things, I don't know. But, my kids loved this dinner. It's down home cookin' at it's best! I served these hamburger steaks with gravy over my mashed potatoes, but you could serve this over egg noodles or rice with great results. Just pick what your family likes best!! I really liked making these hamburger steaks, which ended up being kind of like a mini meatloaf that was cooked on the stove-top instead of in the oven. They were easy and tasty and my family gobbled them up! I used extra lean hamburger when making them, so if you use fattier burger, just be sure to drain any excess fat.

Hamburger Steaks with Mushroom Gravy

2 pounds lean hamburger, divided
½ onion, minced
1 egg
½ cup breadcrumbs
1 teaspoon season salt
½ teaspoon fresh ground pepper
1 teaspoon nature's seasons

Gravy:
½ cup reserved hamburger meat
1 ½ cups sliced mushrooms
¼ cup butter
¼ cup flour
3 cups fat free milk
1 teaspoon salt
½ teaspoon pepper

Mashed potatoes, cooked rice or egg noodles for serving

To make the hamburger steaks, combine the hamburger meat (reserving half a cup for the gravy), onion, egg, breadcrumbs and seasonings in a large bowl. Mix well so that all of the ingredients are combined. Form eight hamburger patties and cook in a skillet that has been heated on medium high heat until they are just cooked through, about 4 minutes per side. You may have to cook in batches if your skillet isn't large enough to cook all of them at once. Once done cooking, place in an oven safe dish and place in a warm oven, about 200° F until ready to serve.

To make the gravy, brown the remaining hamburger in the same skillet that was used before. Add in the mushrooms and cook until soft. Place cooked hamburger and mushrooms into a bowl and set aside. Heat butter in the same skillet until melted, over medium high heat. Add the flour once the butter is melted and cook, stirring with a whisk until slightly browned, about 2 minutes. Slowly add in the milk and whisk until smooth. Season with salt and pepper. Let the gravy come to a boil, stirring constantly. If the gravy is too thick for your likings, add a bit of water until the consistency that you like is achieved. Once the gravy is thickened to your likings, add in the reserved ground beef and mushroom mixture. To serve, place a serving size amount of either mashed potatoes, rice or egg noodles on each plate, followed by a hamburger steak that has been kept warm in the oven and then mushroom gravy. Enjoy!

Friday, September 18, 2009

Not Your Mama's Mashed Potatoes


Eveyone has a recipe or technique for mashed potatoes, right? But does everyone make a good mashed potato? Not always. I was talking to my mother-in-law once about how she learned how to make mashed potatoes. She said that her mom taught her to just drain the potatoes and then use some of the water from the cooking to mix in, add a bit of salt and that was it. YUCK!! I can't stand mashed potatoes like that. Thank goodness my mother-in-law doesn't make hers like that. But, her's aren't like these. And I bet these, aren't like your Mama's!

Not Your Mama's Mashed Potatoes

4 lbs. russet potatoes, peeled and diced
½ cup salted butter
8 oz. cream cheese
1/8 cup heavy cream or whole milk (or more depending on how thin you like your potatoes)
1 tablespoon salt or to taste

Place the peeled and diced potatoes into a large pot and fill with enough water to cover all of the potatoes. Add a bit of salt to the water and boil until tender. When the potatoes are soft, drain the potatoes and place in an electric mixer, adding the butter and cream cheese and mixing until smooth. Add the heavy cream or milk and salt, mix well. Serve warm with gravy of your choice and enjoy! Serves 6-8.

Thursday, September 17, 2009

Hillbilly Donuts

Looks good, doesn't it? I bet you can't figure out what they are made out of. Go ahead, take a guess, I'll wait... Nope, you're wrong. Okay okay, I'll tell you. You're gonna laugh. Biscuit dough, you know, the kind that you buy at the store in the can? Yeah, I know. Doesn't it look like a real donut that you'd get from a bakery? These are so easy to make. And how fun would it be to surprise your family with donuts on a Saturday morning?! If you're like me and you live out in the country, the chances of you going out to get donuts and bring them home are slim-to-none. But now you can have easy yummy donuts, right at home! Without having to make the dough! Yay!

Hillbilly Donuts

1 can of homestyle biscuits
oil for frying
2 cups powdered sugar
1/3 cup milk
1 teaspoon vanilla extract

Make a hole in each biscuit by sticking your finger through the biscuit and stretching it out, until it resembles a donut with a rather large hole. Heat oil in a large skillet until hot. Drop biscuits into hot oil and fry until golden brown on each side, approximately 2 minutes per side. Drain and cool slightly on a paper towel lined cookie sheet. In a large bowl, combine the powdered sugar, milk and vanilla with a whisk to form a glaze, making it thicker or thinner by adding more milk or powdered sugar, according to your likings. Dip each donut in the glaze, place on a wire rack to harden slightly and enjoy!

Wednesday, September 16, 2009

Bourbon Chicken

This is one of my go-to dinners, something that I know my entire family will eat happily and enjoy! I got the original recipe from recipezaar.com, which as I've said before is my favorite site for finding new recipes!! When I make this, I usually like to use boneless skinless chicken thighs because they stay nice and moist, but chicken breasts will also work. And I somtimes double the recipe for the sauce, since my family loves sauce, a lot. Served over cooked white rice with a nice steamed veggie on the side, you've got a great meal!! I hope your family enjoys this as well!

Bourbon Chicken

1 ½ lbs. boneless skinless chicken breasts or thighs, cut into bite sized pieces
2 tablespoons oil
1 garlic clove, minced
¼ teaspoon ground ginger
¾ teaspoon crushed red pepper flakes (use less or leave out if you don't like a lot of spice)
¼ cup apple juice
1/3 cup brown sugar
2 tablespoons ketchup
1 tablespoon vinegar
½ cup water
1/3 cup soy sauce
1 tablespoon cornstarch

In a large skillet cook the chicken pieces in the oil until the chicken is cooked through. Meanwhile, in a separate bowl, combine the remaining ingredients mixing well with a whisk. Once the chicken is cooked through, add the sauce mixture and bring to a boil, stirring frequently until the sauce thickens. Serve over hot cooked rice and enjoy!

Tuesday, September 15, 2009

Basil Garlic Sun Dried Tomato Bread


My favorite method of making artisan style breads is using a big pot to bake the bread in. Using this method always gives me an end result that has a crusty crust and chewy inside. I just love the fact that I can make high quality, delicious bread at home and it's just so easy! I'll never again pay $5 a loaf or more on specialty breads. The possibilities are nearly endless when it comes to the flavor combinations that you can make using the basic dough of this bread. I'll soon be trying a rosemary bread! I can't wait!

Basil Garlic Sun Dried Tomato Bread

3 cups flour
1 teaspoon yeast
2 teaspoons salt
2 teaspoons sugar
2 teaspoons dried basil
1 ½ cups plus 2 tablespoons warm water
¼ cup julienne cut sun dried tomatoes in olive oil
3 cloves garlic, chopped

In a large bowl mix together all of the ingredients until just combined. Let sit, covered with plastic wrap for 4 hours. Sprinkle a fair amount of flour onto a clean surface and plop the dough onto the flour. The dough will be very wet, this is how it should be. Once all of the dough is on the floured surface, fold together in thirds. Then fold the dough in half and shape into a round loaf and sprinkle with more flour. Cover with a towel and let rise for about an hour. Half an hour before the bread should be done rising, place a large oven proof pot with a lid into the oven and preheat to 450° F. Once the pot has preheated in the oven for a half an hour, plop the dough into the pot (it might not look pretty right now, but that is okay) and cover with the lid. Bake for 30 to 35 minutes, when done cooking, cool the bread on a wire rack for at least 30 minutes before cutting into it. Enjoy!

Monday, September 14, 2009

Coconut S'mores Cookies


The other day I was at the store and bought some coconut marshmallows. I was thinking about making some s'mores cookies and once I saw those marshmallows, I knew I had to make coconut s'mores cookies! I looked online to see if anyone else had ever made s'mores cookies and how they went about dealing with the marshmallows and came across Cookie Madness' version of s'mores cookies. She said that it was best to put the marshmallows on towards the end of cooking, so that is what I did. These cookies turned out so good! If you are looking to make some cookies, please try these! You won't be sorry! I made two different sized cookies. Some really big ones that I used a 1/4 measuring cup to scoop and then I used my 2 tablespoon cookie scoop for the smaller ones. I like the size of the big ones, they are really impressive, but you only get about 12 cookies out of the whole batch.


Coconut S'mores Cookies

1 cup butter, softened
1 cup brown sugar
½ cup sugar
2 eggs
1 teaspoon vanilla extract
2 ¼ cups flour
1 teaspoon salt
1 teaspoon baking soda
1/2 cup flaked coconut
1 ¼ cups coarsely crushed graham cracker crumbs
3 regular sized Hershey's bars, coarsely chopped and divided
12 large toasted coconut marshmallows, cut with kitchen shears into 8 pieces each

Preheat oven to 350°F.
Cream together butter and sugars with an electric mixer until smooth. Add in eggs and vanilla and mix well. Mix in flour, salt and baking soda until combined. Add the flaked coconut, graham cracker crumbs and 1 ½ chopped Hershey bars, until combined well. To make large cookies, use a ¼ measuring cup to scoop dough onto ungreased cookie sheets. Bake in preheated oven for 10 to 12 minutes or until the cookies look almost all of the way baked. Take cookies out of oven and then evenly divide the marshmallows and the remaining Hershey's bars among the cookies. Bake for another 1 to 3 minutes or until the cookies are golden brown and the chocolate and marshmallow has begun to melt. Do not over bake. To make smaller cookies use a 2 tablespoon cookie scoop and scoop onto an ungreased cookie sheet. Bake for 8 or 9 minutes, or until the cookies are almost all of the way baked. Take the cookies out of the oven and evenly distribute the marshmallows and chocolate bars and then bake for another 1 to 3 minutes, or until the cookies are set and the chocolate and marshmallows have started to melt. Do not over bake. Remove onto a cooling rack to cool and enjoy!


Here is a picture of the smaller version of these cookies, I couldn't fit as much stuff on the top of them, but they were still really yummy!

Saturday, September 12, 2009

And We Have A Winner!!

In more ways than one!! First off I'm going to give you all an update on how I did at the fair with the things that I entered, then I'll let you know the winners of the Oikos giveaway!

As you might remember from this post, I entered eleven things into our state fair. Here are my results!!

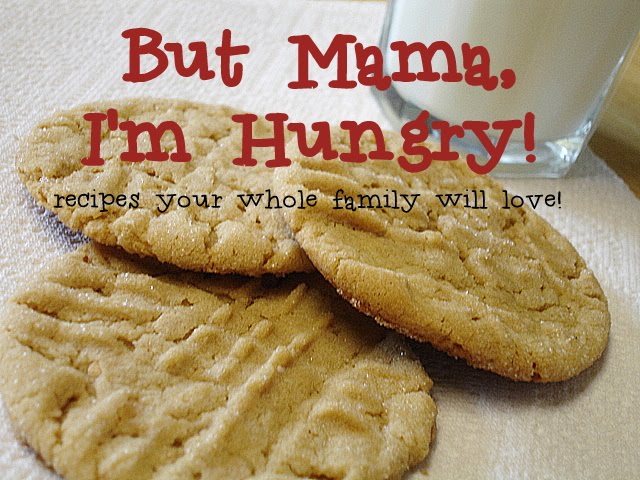
* Jalapeno Cheese Bread - 2nd place in the "other bread" category according to the judges, but I also got overall best bread, with the superintendent's award for all of the breads. So, I got a red ribbon and a pretty big huge red, white and blue ribbon!

* White Bread - didn't get anything for this one, I didn't expect it, I was having an off day and didn't let it rise enough.

* Wheat Bread - I got a blue ribbon, first place in 100% whole wheat category.

* Zucchini Bread - didn't get anything.

* Double Chocolate Chip Zucchini Bread - I got an honorable mention on this one, next year I'm entering this in the zucchini bread category.

* Pumpkin Chocolate Chip Bread - First place blue ribbon for this recipe!!

* Chocolate Chip Pudding Cookies - nothing for these, but seriously, it's so hard to place in the chocolate chip cookie category! I think this will be my last year attempting that category.

* Cookies and Cream Chocolate Chip Cookies - didn't get anything for these either.

* Oatmeal Coconut White Chocolate Macadamia Nut Cookies - I got a blue ribbon, first place in oatmeal cookies for these!! They were so good!

* Peanut Butter Honey Cookies - honorable mention for these.

* Flour Tortillas - second place for these. I was kind of mad about that because the person that won first's looked like the tortillas were store bought. Seriously, they looked perfectly round and looked like mission tortillas. Oh well.


Now for our winners!! I went to random.org and got my two winners!!

My first winner, Misty will be getting the 4 free 5.3 oz Oikos coupons, $5.00 worth of other Stonyfield coupons, and a reusable Stonyfield shopping bag!!

Misty.Castagno said...
My husband and I just love the jalapeno cheese bread and the guacamole. I too can't wait to try the Chile Verde. It seems alot simpler than trying to deal with all the tomatillos at home and stuff.. I love coming on here and finding the new recipes. Almost all of them end up in my tried and true binder(or should I say binders) lol... Thanks so much


And, my second winner, Kandi will be getting a coupon for a free 16 oz Oikos yogurt along with $5 worth of other Stonyfield coupons and a nifty little magnet!!

Kandi said...
I haven't had time to try any recipes yet, but #1 on my list are the Cookies & Cream Chocolate Chip Cookies and then your Zucchini Lasagna. Yummm.

Thank you to all that entered!!

Just so you all know, I've been crazy busy canning and freezing things from my garden, so if I'm not around much, that's why!

Tuesday, September 8, 2009

Creamy Cilantro Avocado Sauce & My First Giveaway!

Oh, I'm in love with this sauce. Seriously, it's yummy!! I love anything with cilantro in it, and for me, the more cilantro the better!! And don't even get me started on avocados!! I love them!! I made this creamy delicious sauce recently to go on some tacos that I was making. I've actually made it twice in the past couple of weeks, it's that good! The first time I made it with some grilled marinated pork chops it was sooo good! Then we had it the next week with fish tacos that my hubby made (sorry no recipe for that one, he made it up as he was going). I can't wait to make this again!!

And, the secret ingredient in this yummy sauce is Greek yogurt!! I just recently found Oikos Greek yogurt, made by Stonyfield Farm in my local stores. I was so excited to see it at the store! I had heard people rave over Greek yogurt for the longest time and could never find it out here. Now I know why everyone raves about it! It's creamy and delicious and works great in this Creamy Cilantro Avocado Sauce!!

Are you ready for the giveaway!!??? I've got two great prizes to giveaway today!! One of you will be winning 4 free 5.3 oz Oikos coupons, $5.00 worth of other Stonyfield coupons, and a reusable Stonyfield shopping bag!! And the next winner will be getting a coupon for a free 16 oz Oikos yogurt along with $5 worth of other Stonyfield coupons and a nifty little magnet!! I'm so excited about this giveaway, it will give you a chance to try the yogurt and fall in love with it!! To enter the giveaway, leave me a comment on this post about your favorite recipe of mine so far!! You will have until Friday, September 11th at 10:00 pm Mountain Standard Time to enter and please be sure to leave a way for me to contact you if you are a winner! I'll announce the winner on Saturday the 12th! Good luck to you all and in the meantime, visit Stonyfield Farm for some great coupons!

Creamy Cilantro Avocado Sauce

1 bunch cilantro, leaves cut off some of the stem is fine
2 large cloves garlic
1 jalapeño pepper, seeded
2 tablespoons lemon juice
5 tablespoons water
5.3 ounce container plain Oikos Greek Yogurt
2 medium avocados
1 teaspoon Kosher salt
½ teaspoon pepper
2 teaspoons sugar

Put all ingredients into a blender and blend well until the sauce is a smooth texture. Enjoy over tacos or as a dip for chips!

Monday, September 7, 2009

Cubano Marinade

Yum!! That's all I have to say about this marinade! I love Cuban inspired flavors! Citrus, cumin, garlic...there isn't anything better!! When we made these pork chops I actually cut up the meat and then made soft tacos (with corn tortillas) out of it. Served with a cilantro avocado sauce (recipe coming tomorrow!) they were amazing!! I can't wait to make this again with chicken instead of pork!! I'm sure your family will love this too!!

Cubano Pork or Chicken Marinade

3 limes, juiced
1 teaspoon cumin
2 garlic cloves, crushed
¼ teaspoon onion powder
¼ teaspoon pepper
2 tablespoons olive oil
1 teaspoon bitter orange Goya adobo seasoning
6 pieces chicken or pork chops

Mix all of the marinade ingredients together in a large zip loc bag, add 6 pieces chicken or pork chops, close bag and mix together to coat the meat. Refrigerate for at least 1 hour or as long as 6 hours. Grill or bake in the oven at 375° F until meat is cooked through. Enjoy!

Saturday, September 5, 2009

Busy With The Fair

On Wednesday the second, I was busy all day baking up a storm to enter things into the fair. I actually started on Tuesday. Needless to say, I've been pretty busy!! Not to mention that my son started preschool this week! So, I haven't been on here much to update things. Thank goodness for scheduled posts!! So, I thought I'd share with you a list of the things that I entered into the fair. And if your in my area and are going to be attending the Eastern Idaho State Fair, be sure to check out the baking section and look for my things! I won't be able to go until Thursday to see if I won anything or not. Crossing my fingers for a couple of blue ribbons!!

I entered eleven things all together, some things didn't turn out the way I would have liked, but I guess that is what happens when you are trying to get a million things done in 1 1/2 days with children home! So, here is my list, if the recipe isn't up yet, it will be up soon!!

* Jalapeno Cheese Bread
* White Bread
* Wheat Bread
* Zucchini Bread
* Double Chocolate Chip Zucchini Bread - entered as a "other" quick bread
* Pumpkin Chocolate Chip Bread
* Chocolate Chip Pudding Cookies
* Cookies and Cream Chocolate Chip Cookies - entered as a "other cookie"
* Oatmeal Coconut White Chocolate Macadamia Nut Cookies - entered as a "oatmeal cookie"
* Peanut Butter Honey Cookies - entered as a "honey cookie"
* Flour Tortillas

So, there you have it! I'll be posting the recipes for the ones I don't have up shortly! Did you enter anything into your local fair this year? Did you win anything!? I'd love to hear!!

Friday, September 4, 2009

Pico de Gallo


I love fresh salsa, it's so easy to make and it tastes so good!! Made with fresh from the garden tomatoes, it's even better! I love the already minced garlic in the jar, that is what I usually use in most of my recipes, it can be used in this recipe, but fresh garlic that you mince yourself will be 100 times better! It's worth the extra work for me to mince the garlic for this Pico de Gallo. This recipe is more of guide then an actual recipe also, you can adjust anything in the recipe to your family's likings. If your family doesn't like much onion, don't put as much in. If you really love cilantro, like me, add a whole bunch. If you don't like much spice, only add one jalapeño. Make it how your family will enjoy it!! Serve with homemade or store bought tortilla chips and your good to go!!

Pico de Gallo

6 roma tomatoes, chopped
1 small onion, minced
2 cloves garlic, minced
2 jalapeño peppers, minced
½ bunch cilantro, chopped
1 teaspoon kosher salt (or more to taste)
½ teaspoon fresh ground pepper (or more to taste)

Mix all ingredients together in a bowl, cover with plastic wrap and refrigerate for at least one hour before serving. Stir once more before serving and enjoy with your favorite chips!

Homemade Tortilla Chips

desired quantity corn tortillas
oil for frying
salt

Heat oil on high heat in a large skillet. Make sure there is at least ½” of oil. Cut the corn tortillas into slices that resemble chips. Place cut tortillas into hot oil and cook 1 to 2 minutes per side, until they are a golden brown color. Take browned tortilla chip out of oil and place on a paper towel lined plate, season with salt and enjoy!

Thursday, September 3, 2009

Mexican Rice

Mexican rice has always been something that isn't very easy for me to replicate at home. The rice in restaurants is sort of dry, not sticky at all and has such good flavor. I've been trying to make a good Mexican rice for a long time now and never could get it right. Until one day I just decided to ask the waitress at the local Mexican restaurant how they made the rice. She told me that they fry the rice in oil before adding any liquids. Who knew? So, I tried frying the rice in oil before adding liquid and guess, what? It worked! Here is my version of Mexican rice, give it a try and let me know what you think!

Mexican Rice

3 tablespoons oil
2 cups long grain white rice
½ onion, diced
2 cloves garlic, minced
1 teaspoon kosher salt
½ teaspoon pepper (not fresh ground)
1 teaspoon chili powder
½ (8 ounce) can tomato sauce
2 (15 ounce) cans chicken broth
3 tablespoons salsa

In a large pot heat oil over high heat. Add in the rice, onion and garlic and cook, stirring constantly until the rice starts to brown and the onions are soft. Add in the salt, pepper and chili powder and stir well. Pour in the tomato sauce, chicken broth and salsa and stir well. Let the mixture come up to a boil, stirring frequently. Once a boil is reached cover with a lid and reduce heat to low. Cook for about 25 minutes or until the rice is no longer crunchy. Enjoy with your favorite Mexican dishes!

Wednesday, September 2, 2009

Chile Verde


Chile Verde has to be my all time favorite thing to order at Mexican restaurants. Specifically at La Piñata in Hayward, California, where I grew up. You just can't get any better than La Piñata! But now that I live in Idaho, I have to make my own. I just haven't been able to find a restaurant out here that even comes close. Now all I need to do is learn how La Piñata makes their delectable corn tortillas. Yum!! So, I'm not saying that my Chile Verde is anywhere near as good as the one that I love so much, but it's pretty dang good. And it's super easy too!! With the help of bottled salsa verde, it makes it so much easier than dealing with tomatillos at home. Which I have done, and I prefer this recipe a million times over to the one I made completely from scratch. Just be sure to get mild or medium salsa verde so that your chile verde isn't too spicy. If you've been to La Piñata before, I'd love to know, leave me a comment about your favorite La Piñata dish!!

Chile Verde

5 lbs pork butt, cubed seasoned with garlic salt
Oil for browning meat
2 onions, sliced
4 cloves garlic, minced
3 Roma tomatoes,chunked
2 (16 ounce) jars La Victoria Salsa Verde
1 tablespoon Cumin
½ bunch Cilantro, chopped

Season pork with garlic salt and brown well in oil. Add onion, garlic and tomatoes; sauté for 2 minutes. Add salsa Verde and cumin bring to a boil. Cover and reduce to simmer, cook at least one hour or until meat is tender. Ten minutes before eating add cilantro, mix well. Serves 6-8.


Tuesday, September 1, 2009

Easy Guacamole


This will be the first of my Mexican Feast recipes! A couple of weeks ago I spent all Sunday in the kitchen making Chile Verde, Mexican rice, refried beans, pico de gallo, homemade chips and this easy guacamole. We ended up making burritos out of it all, if you'd like to see the huge burrito that my husband made, go check out over here. Anyway, I'll be posting the other recipes in the following few days. This guacamole is so easy to make that it's funny! And as far as I'm concerned, it's the only guacamole recipe you'll ever need!
Easy Guacamole
2 Haas avocados
1/4 cup salsa or pico de gallo
1/2 - 1 teaspoon garlic salt, to taste
fresh ground pepper to taste
Cut the avocados open, take out the pit and then take out the flesh using a spoon. Place in a bowl and mash with a fork. Stir in salsa, garlic salt and pepper and taste. Check to see if it needs more salt or pepper. Serve and enjoy!